PHP & MYSQL TUTORIAL/PROGRESS BLOG
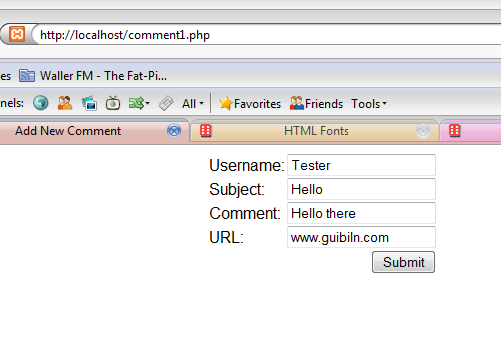
Comments/Guest Book
PART 4 "Sorting By Date"
Comments/Guest Book
PART 4 "Sorting By Date"
The next thing I wanted to do was to be able to sort the information backwards, so the latest items of data appear at the top. Although I realized this would be possible to do by simply doing a descending sorting of the ID, I thought it would be more useful to sort descending by date as this is another piece of information that would be useful to provide on a comments page/guest book, etc.
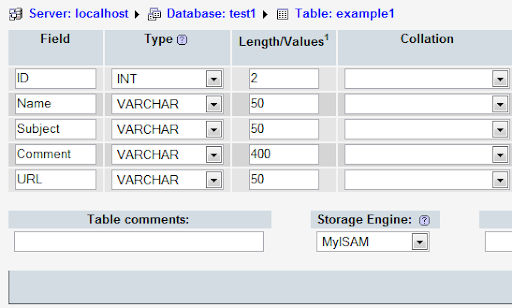
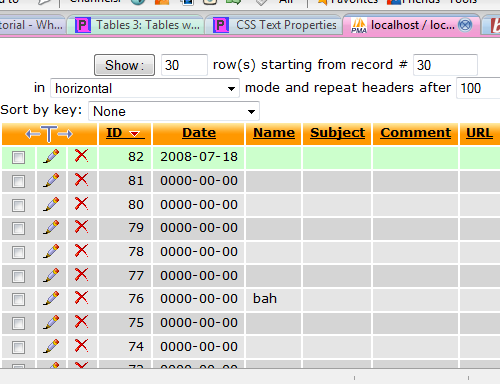
Adding Date field into database table
This is done by going back into the phpMyAdmin front end and clicking the structure tab. Underneath the table is a bit that says Add (number) field(s) At End of Table/At Beginning of Table/After (field name). Since it is more organized to keep the ID as the first field, choose After, and the field name you want it to be after (ID in this case). Name the field 'Date' and select type as 'Date' too. Save this then go back to the php file.
Writing the date into the database
All you need to do in the php is add 'Date' into the list of fields you are adding to and 'CURDATE()' as its associated value. The line should look like this:
$query = "INSERT INTO example1 (Date, Name, Subject, Comment, URL) VALUES (CURDATE(), '$Name', '$Subject', '$Comment', '$URL')";
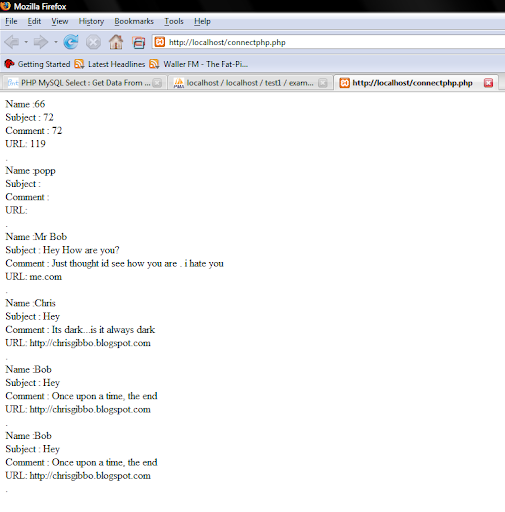
Save the file and open it from within Firefox. Press submit and then if no errors appear, go back into phpMyAdmin and click the Browse tab, where you should see the date stored in the most recent Id's date field (click ID to make the ID list descending so the newest is at the top).
Information/help from:
page resource
electric toolbox
Tiz Taz
©Chris Guiblin 2008
URL: www.guiblin.com/chris/
EMAIL: chris@guiblin.com