Showing posts with label php. Show all posts

Friday, April 13, 2012

Exporting MySQL to Excel XML with formatting through PHP


The Requirement
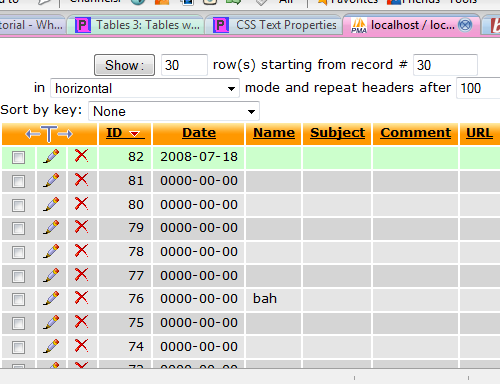
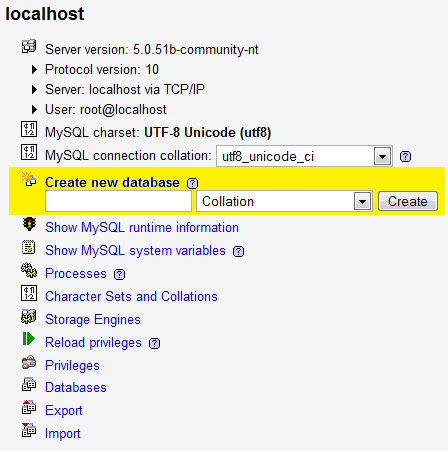
Over the last couple of days I have been working on creating a way of getting data from a MySQL Database and getting this into an Excel spreadsheet for a project for a client.  This is something I had done before so I thought it would be no big task.  In fact, phpMyAdmin (apparently, though I haven't tried it) has a way of exporting data into a CSV file which is readable by excel.

The Problem
The problem is, a CSV file is a simple dump of data into a file, which contains no formatting, and so can make the spreadsheet look pretty ugly as well as hard to read.  This is obviously not what a client, or anyone wanting to analyse the data from a spreadsheet wants.

The Solution
So after hours and hours and hours of searching the internet and trying all different methods (none of which seemed to work correctly - for me) for one reason or another, I decided to reverse engineer an Excel file; create a basic spreadsheet, format it as required, and save it as an Excel XML file.  Then all I would have to do is open it up in a text editor, see how Excel was formatting the file, and recreate this with some php code and adding in the functionality to get the data from the required database then save that into an xml file.

If you want to do a lot of formatting to your spreadsheet,  then I recommend you reverse engineer your own Excel file sheet, and recreate it with php yourself.  If there is a quicker way of doing this, let me know, but this is the only way I could personally get it working.

Tools
Something I found very useful for this was a basic online tool called XML Pretty Print (http://xmlprettyprint.com/) that converts ugly xml with all the tags pushed up together in a very hard to read way into a much more organised, easy to look at layout.  This made it a lot easier to separate the different lines of XML code when it came to creating the php file.

I also used Compare My Files (http://www.comparemyfiles.com/) to compare the XML file I exported from Excel with the XML file created from the code when it wasn't working, to see what was wrong with the php created XML file.


Example
Here is what I ended up with.  It took quite a bit of playing around with to get it working fully.  The slightest mistake and Excel would show a blank spreadsheet.  (To be honest, I was using Open Office, so Excel may have opened it, I don't currently have Excel installed to test it on).

Feel free to play around with this and see how it works for you.


//Connection to Database - Fill in with the details for your database
$host = '';
$user = '';
$pass = '';
$database = '';
$table = '';

//Code to connect to the database
$linkID = mysql_connect($host, $user, $pass) or die("Could not connect to host."); 
mysql_select_db($database, $linkID) or die("Could not find database."); 

//Query the database - select all fields 
$query = "SELECT * FROM `$table`"; 
$resultID = mysql_query($query, $linkID) or die("Data not found."); 

//The XML code. $xml will store the entire xml structure and will be
//saved to an xml file at the end.

$xml = '';
$xml .= '';
$xml .= '';

$xml .= '';
$xml .= '';
  $xml .= '';
   $xml .= '3'; 
   $xml .= '#c0c0c0'; 
   $xml .= '';
   $xml .= ''; 
   $xml .= '4'; 
$xml .= '#ff0000'; 
   $xml .= '';
   $xml .= '';
$xml .= '';

$xml .= '';
$xml .= '9000'; 
  $xml .= '13860'; 
   $xml .= '240'; 
   $xml .= '75'; 
   $xml .= 'False'; 
   $xml .= 'False';
$xml .= '';


//STYLES - This is the style information used for the rows, 
//columns and individual cells

$xml .= '';
$xml .= '';
  $xml .= '';
  $xml .= '';
  $xml .= '';
$xml .= '';
$xml .= '';
$xml .= '';
$xml .= '';
//END STYLES

//WORKSHEET
$xml .= '';
//TABLE
$xml .= '
';
   $xml .= ''; 
  $xml .= '';
$xml .= '';
$xml .= '';
$xml .= '';
//HEADER ROW
$xml .= '';
//CELLS
$xml .= '';
  $xml .= 'Order ID'; 
   $xml .= '';
$xml .= '';
   $xml .= 'Invoice Number'; 
  $xml .= '';
 
$xml .= '';
   $xml .= 'Customer ID'; 
   $xml .= '';
 
$xml .= '';
   $xml .= 'Store Number'; 
   $xml .= '';
  $xml .= '';
   $xml .= 'Total'; 
  $xml .= '';
//End CELLS
   $xml .= '';
//End HEADER ROWS
//Code to get rows from database - you will have to replace the row names with the rows in your database.

for($x = 0 ; $x < mysql_num_rows($resultID) ; $x++)  //Loop through all rows and do the following for each
$row = mysql_fetch_assoc($resultID); 
//ROWS
$xml .= '';
//CELLS
$xml .= '';
$xml .= ''. $row['order_id'] .''; 
$xml .= '';
$xml .= '';
$xml .= ''. $row['invoice_no'] .''; 
$xml .= '';
$xml .= '';
$xml .= '' . $row['customer_id'] .'';
$xml .= '';
 
$xml .= '';
$xml .= ''. $row['store_name'] .''; 
$xml .= '';
$xml .= '';
$xml .= ''. $row['total'] .''; 
$xml .= '';  
//End CELLS
$xml .= '';
//End ROWS
}
  $xml .= '
';
//End TABLE
   $xml .= ''; 
  $xml .= '';
  //End WORKSHEET

$xml .= '';
//End WORKBOOK

//Write the entire xml structure and data to an xml file "xmlOutput.xml"
$fp = fopen("xmlOutput.xml", "w");
fwrite($fp, $xml);
fclose($fp);

echo "XML Data written to xmlOutput.xml";

?>


Thursday, September 25, 2008

My Website

I've been doing some more work on my website and have now programmed it so different sections appear in the correct pages by looking up in the database the relevant data.

http://www.colinjensen.co.uk/~gibboco/index.php?pg=home

Friday, September 19, 2008

Website update

Over the summer I started learning some php and use of mySQL databases in websites.  After finishing the current version of the Wizards game (which is not really finished, but I'm having a break) I came back to doing a little bit of web stuff.  Here is the page at the moment of writing this page http://www.colinjensen.co.uk/~gibboco/1/index.php  (its on my friends website, not got around to getting my own domain name yet).  Theres nothing much there, and I know the design is pretty much none existant.  The only thing the site does is gets the information from the database and displays different posts in the blog depending on which category is selected. Nothing amazing and needs work but it's a start.

Friday, July 18, 2008

PHP (4) - Sorting By Date

PHP & MYSQL TUTORIAL/PROGRESS BLOG


Comments/Guest Book

PART 4 "Sorting By Date"


The next thing I wanted to do was to be able to sort the information backwards, so the latest items of data appear at the top. Although I realized this would be possible to do by simply doing a descending sorting of the ID, I thought it would be more useful to sort descending by date as this is another piece of information that would be useful to provide on a comments page/guest book, etc.

Adding Date field into database table

This is done by going back into the phpMyAdmin front end and clicking the structure tab. Underneath the table is a bit that says Add (number) field(s) At End of Table/At Beginning of Table/After (field name). Since it is more organized to keep the ID as the first field, choose After, and the field name you want it to be after (ID in this case). Name the field 'Date' and select type as 'Date' too. Save this then go back to the php file.

Writing the date into the database

All you need to do in the php is add 'Date' into the list of fields you are adding to and 'CURDATE()' as its associated value. The line should look like this:

$query = "INSERT INTO example1 (Date, Name, Subject, Comment, URL) VALUES (CURDATE(), '$Name', '$Subject', '$Comment', '$URL')";


Save the file and open it from within Firefox. Press submit and then if no errors appear, go back into phpMyAdmin and click the Browse tab, where you should see the date stored in the most recent Id's date field (click ID to make the ID list descending so the newest is at the top).


Information/help from:

page resource
electric toolbox
Tiz Taz

©Chris Guiblin 2008
URL: www.guiblin.com/chris/
EMAIL: chris@guiblin.com

Thursday, July 17, 2008

PHP (2) - MySQL Database

PHP/MYSQL TUTORIAL/PROGRESS BLOG


Comments/Guest Book


Xampp phpMyAdmin
One thing I like about XAmpp is the built version of phpMyAdmin, which is an easy to use front end for MySQL. This can be accessed by going to "http://localhost/xampp" and following the link to phpMyAdmin under the tools section of the left hand navigation, on the XAmpp front page (http://localhost/phpMyAdmin).

CREATING A NEW DATABASE
A new database can be created easily using the Create new database field:


CHOOSING TABLE NAME AND NUMBER OF FIELDS
I have named my database "test1", on the next page choosing "example1" as the new table on the database. I chose five for the Number of fields (different bits of information that will be entered into the table). When creating a database it is best to plan what information is going to be entered into the table and entering the Number of fields accordingly. Both the database and table name should be relevant to what it is going to be used for so you can remember what is what when you have multiple databases and tables.

FIELD NAMES, TYPES AND LENGTHS

For this Database table I chosen field names which would be used on a comments page or guest book; Name, Subject, Comment and URL, as well as ID which will be the comments number (1 for the first comment, 2 for the second, etc). I have set the field type for ID to INT, with the others as VARCHAR. For the Length/Values, I have chosen numbers which I think will be about right for these field inputs.

I have also chosen for the ID field to be set to 'Primary' and 'auto-increment', which makes it the primary field as well as automatically increasing the number in the field as required for the ID field. Choose the Collation you want (chosing none defaulted to latin1_swedish_ci for me, so I chose to use ucs2_bin).


CONNECT TO DATABASE WITH PHP
Now to the coding. Bring up your text editor and enter the following:
$dbhost = 'localhost';
$dbuser = 'root';
$dbpass = '';

$conn = mysql_connect($dbhost, $dbuser, $dbpass) or die ('Error connecting to mysql');

$dbname = 'test1';
mysql_select_db($dbname);
?>
Things you may have changed which may be causing you problems: If you have set up a username and password for your database, change these accordingly under "$dbuser = " and "$dbpass = ". Also, if you didn't call your database "test1" then type whatever you did call it under "$dbname = ". Also ensure there are ";"'s at the end of every line where it is needed.

Save this file as a php file (I named mine connectphp.php) in C:\xampp\apache\htdocs (or the relative location if you put it somewhere else). Access the page in your web browser (http:\\localhost\connectphp.php in my case) and it should be blank, which is a good sign that it hasn't caused an error.


Information/help from:

Collin Jensen
php.net
php mysql tutorial


©Chris Guiblin 2008
URL: www.guiblin.com/chris/
EMAIL: chris@guiblin.com

PHP (1) - Hello World

PHP & MYSQL TUTORIAL/PROGRESS BLOG

Comments/Guest Book

PAGE 1 "HELLO WORLD"


Introduction


For this tutorial bog I am using Xampp running all the available services included with it on a home computer not running as a web server. Most of the information is going to be the same whether or not you are using Xampp. One thing to note is that not all webspace providers support php and mysql. If you are using a service like this, check whether php and mysql are supported with them before attempting any sort of php /mySQL project.

This tutorial is as much a documentation of what I am doing than teaching how to do it. Although I have some previous experience with web servers, programming and a very small amount with PHP and mySQL, this is a learning experience for me, I just thought it might be useful to write how I am doing it, for anyone else who might be attempting this and has come across this page. If you spot anything wrong then please send a comment or email me and I will check it out.

DOWNLOAD AND INSTALLATION (windows)

Firstly, install XAMPP from
http://www.apachefriends.org/en/xampp.html. I first tried the ZIP file
and tried installing the windows version on my computer. However this
failed, I think because I am using vista and the version wasn't made
for that. So probably best using the installer. Follow the installation
(don't install to program files if in vista, as it will tell you),
enabling the services you want. You must enable php for the above to
work. I have installed everything as I will be dabbling with mysql and
possibly other services later on.


VIEWING/EDITING THE INDEX PAGE


In your web browser go to "http://localhost". This brings up
the yellow and orange xampp page with information and demos, etc. This
will take you to "http://localhost/ampp". Change it to
"http://localhost/index.html to view the index page, which will display
the text "It works!"


To get to where this page is actually stored in your computer,
go to the directory where you installed Xampp ("C:\Xampp" in my case).
You should see a folder named "htdocs". This is where the pages are
stored which will actually be accessible through the web server. In
here you will find a file "index.html", which is the page displayed
when you go to "http://localhost/index.html".


To edit the content of the page, open the file with notepad,
dreamweaver, or any other text editor/web design software. If you don't
understand any of what has come up, you should probably go searching
Google for help or buy a book on basic html. All you need to do to
change the text on the page is to change the text between the tag


Once You have done this, save the text file and reload the page in your browser to display the change.


PHP

Since PHP works differently to html, we will need to change
the file in a few ways to make it work using php. Php in itself is not
built into browsers like html is, therefor it is up to the server to
deal with the php code, and that is why php needed to be installed as a
service earlier.


To create a php document, you must start with "<h&gt;" to show that this is the end of the php code.

To create the words "Hello World" or "It works!" you use
the command "echo" which just means to display the value of something.
In this case you just want to display a string value, so you just need
to type the following:

<?php
echo "Hello";
?>
notes: you must put ";" at the end of echo "Hello" to show
that this is the end of the line of code, and to allow the action to be
performed.


Information/help from:

Collin Jensen
php.net
php mysql tutorial


©Chris Guiblin 2008
URL: www.guiblin.com/chris/
EMAIL: chris@guiblin.com